
By Rob Parrish
Quicksilver, At Sea
(actually Stockton, but technically still correct)
I asked my wife Monika what is the secret to mooring at Angel Island. She replied instantly and without emotion: “a prenup”.
Monika and I moor our Catalina 34 Quicksilver at Angel Island at least once a month. We view the concomitant yelling from bow to stern as a healthy catharsis in our relationship.
{Editor’s Note: In an earlier version of this article, the author proceeded with some excellent descriptions of some spirited communication (that can only really be had between those in the most loving of relationships) about the perceived location of the mooring balls, stationary boats that seemed to be on a collision course, as well as significant others comments on particular set of organizational skills. We thought it might be better to leave these “conversations” to the reader’s imagination.}
In all seriousness, mooring at Angel Island is one of the most challenging and rewarding experiences for a Bay sailor. We’ve found that there are some things you can do to maximize your chance of total success, but this is seemingly not one of those skills that becomes monotonically better with time. In fact, we made a special stop at Angel Island the other day to get some pics for this article, and it was almost a complete bust. That being said, we’ve always fixed it in the end, and enjoyed a great overnight. So we encourage you to make a careful plan, don’t be discouraged when the plan goes 100% awry, and then enjoy the wonder of Angel Island.
Disclosure: The advice below is a result of many misadventures during Angel Island moorings, and the best that Monika and I can provide at present. You may find that other techniques work better for the unique situation of your boat.
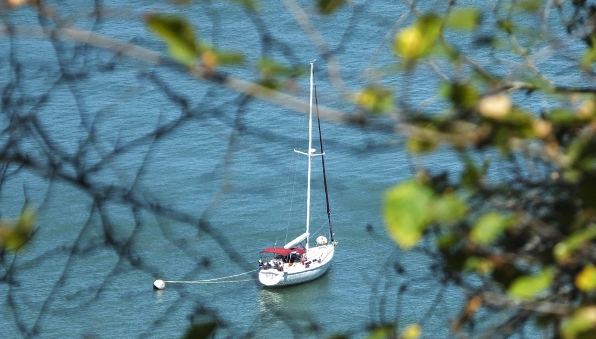
Let’s talk about the logistics first: At Angel, you moor at Ayala Cove, on the north side of the island (see numerous photos below). The high currents of Raccoon Strait require you to attach to a mooring ball fore and aft for 2 total mooring balls, which turns out to be much more complicated than 1 mooring ball. The mooring balls are roughly 75′ apart, and the rules say you are to moor with the bow facing northeast. The balls are labeled with either red or yellow stripes – you either grab 2 red or 2 yellow balls. The nightly fee for the mooring ball is $30 (cash preferred), which can be paid at the day-use docks also located in Ayala Cove. Note that you cannot stay overnight at the day-use docks. The day-use slip fee for the docks (needed to explore the island if you don’t have a dingy) is $15, but this is already included if you pay the mooring ball fee.


Next, let’s talk about the challenges:
- Tide/Depth: MLLW in the mooring field is ~5-6 ft. It is nice soft mud, so there is low penalty for grounding here, but because of this you need to plan carefully. On the way out the other day, we had to leave at 0530 to avoid a -2 ft spring tide, resulting in us fighting a 3 kt ebb up at the San Pablo straight. Another time, we had a lovely forced afternoon sail on fellow Spinnaker Sailing instructor Nick Halkowski’s boat: his could move and ours could not, so that decided the plans for the day.
- Current: The currents are strong and squirrelly in Ayala Cove. This makes maneuvering extra tricky.
- Wind: The winds in Ayala Cove are generally pretty light, but they can be gusty and are subject to sudden shifts. This will invariably happen at a critical moment in your maneuvers.
- 2x Mooring Balls: The issues here are (A) which one to hook first (B) whether to approach balls 1 and 2 in forward or reverse (C) how to hook each ball and (D) how to have enough line to go from ball 1 to ball 2.
Now, let’s talk about the ideal setup, which is easiest to understand in reverse: You wake up the next morning in stellar Ayala Cove (my brother calls it “Jurassic Park” – with good reason), enjoy some coffee as the sun comes up, and then go to slip your lines. You have a long line cleat hitched to the port stern cleat, running out to turn through the ring on the stern ball (a 180 “half turn”) and then coming back to cleat hitch to the starboard stern cleat. The same thing happens on your bow, with a second long line. The lines are neither slack nor taught (unless the boat is loaded by wind/current), but droop gently to just touch the water. This holds you securely but not piano wire tight in your mooring spot. To depart, you first turn on and warm up the engine. Then, you release one of your stern cleat hitches and pull the line in from the other stern cleat hitch (don’t release both at the same time or you’ll lose the line). You have a favored crew member do the same thing simultaneously at the bow. In about 10 seconds work, you’ll have a completely free boat sitting stationary in its mooring spot with both lines on board. Then you just motor away.


Next up is equipment: To get to such a slick setup requires some serious prep work. A lot of this starts at West Marine or online at Catalina Direct the week before. You will definitely need an extra piece of 1/2″ nylon 3-strand line (essentially anchor line) that is no less than 100′ in length. (If you are chartering a boat through Spinnaker ask the office when you reserve the boat for charter if you can have a long line for mooring at Angel Island). A lot of people think they’ll just tie their dock lines together. That doesn’t work on a good day. I had a bad day recently where I tied 3 ea. 50′ dock lines together and then used my 100′ line to get the mooring to send. Are your docklines all 50′ (looking at you Miss T)? Another piece of equipment I recommend is what Monika calls our “crab claw” system: 2 each, “Grab’N’Go” hooks with matching 70′ leashes of 1/4″ Dyneema line (attend Spinnaker Sailing instructor Patrick Twohy knots clinic for help learning to splice that). Also a tender (dingy/kayak/paddleboard) can help, but is asking a lot.
Next up is the plan: Planning is the difference between a bad mooring and a disaster at Angel. When you are 1 nautical mile out, you need to start laying your lines out, finding the boat hook, and discussing the plan. By the time you arrive at the cove, your equipment should be all in order and your crew in agreement about Plans A, B, and C. The other day, I watched a motorboat hover around the crowded mooring field for 45 min inflating a rubber dingy and then giving rowing lessons to the crew, all due to a lack of planning.
Last to discuss are my favorite approaches in descending preference order:

- Tender Approach (requires Dingy/Kayak/Paddleboard): Prep the boat with lines fore and aft. Go and grab the windward mooring ball (usually the northeastern one) with the bosun’s hook and attach the appropriate bow or stern line just as you learned in BCC/BBC. Then send the tender out with the other line. This may require extremely long lines if the boat drifts perpendicular to the mooring line while the tender is underway, but is really low stress.
- Crab Claws Approach (requires “Grab’N’Go” hooks w/ Dyneema leashes): Approach the mooring line from the southwest (stern then bow), and to windward of the mooring balls (just like MOB drills). At the first mooring ball, clip the stern crab claw, which should be attached on your longest Dyneema leash to a stern stanchion on the leeward side (keep the cleats free for the proper mooring line). Then motor ahead and, at the second mooring ball, clip the bow crab claw, which should be attached to a shorter leash to a bow stanchion on the leeward side. Then tighten the crab claw leashes enough that you don’t drift into your neighbors. Now you are safe – relax and have a beer, because what comes next is conceptually easy but a lot of sweat in practice. You will need to pull one of the Dyneema leashes in far enough to swap to the proper mooring line. Then let that mooring line out, pull the second leash, and then swap that mooring line out. In high wind/current, I have found that this requires a winch on the Dyneema leash – make sure to leave enough tail on the stern leash to get 4 or 5 wraps on the jib winch. Remember during the second part that there is no maneuvering danger involved…and that you will look like Popeye when you are done. This is my favorite non-tender approach, as it works >90% of the time. However, there is one big catch: if you mess the bow clip up with the stern clip in, be really careful to not slurp the stern leash into the prop when you try the bow clip again.
- Back and Forth (requires only 100′ line): This approach is unconventional, but works really well if you have a sugar scoop or swim platform on the stern. Back the boat (from a long way out) slowly at the stern ball. Have a crew member slip the long stern line through the stern ball and back to the opposite cleat when you arrive at the stern ball. Then, power forward to the bow ball, and grab as normal. This works really well in most cases, as the backing maneuver is done first, with no restriction on your motion, and then the forward maneuver is the one with the restriction. Do be careful that your stern line is long enough to permit the bow grab. Also, if you have to reset after grabbing the stern line, be very sure to not run over your stern line.
- Forth then Back (requires only 100′ line): This is exactly the opposite of the Back and Forth, and the one that I see most people attempting. It is conceptually simple in that you pick up the bow ball just like in BCC/BBC…and then have to back down on the stern ball with a leash on your bow. I find that it does not work well at all unless the wind/current directly move you from the bow ball to the stern ball. E.g., by the time you figure the prop walk out, you are usually out of bow line when doing your stern “lunge.” So I include this as one that you can try, but that I am not a fan of.

Random Pieces of Advice:
- Know what the currents are doing prior to going into the cove. This will help you understand the back eddy effects you’ll experience as you approach the buoys. Weirdly, it is a bit deeper right near shore than in the middle of the mooring field. So you can safely approach the closest mooring balls to shore from the “inside” route.
- Don’t tie to the mooring balls. Instead, loop lines that are twice as long through the mooring balls and back to your boat. This will save you a ton of trouble when you go to depart.
- Don’t moor across the field from a yellow ball to a red ball. This is like parking perpendicularly across two parking spaces – bad karma will follow.
- Check that you are not grounded before you slip the lines. I’ve seen people slip both lines like a hero and then have to sit there nervously for a couple hours hoping the current doesn’t slowly inch them down onto their neighbors as the tide comes back in.
- If you think you might ground, leave the rudder unlocked. At the very least, do not use the autopilot to lock it (a bad habit that many of us get used to at the dock). If you do ground, tremendous force will be placed on the autopilot.
- Don’t raft. The rules let you raft 2x boats and save some $$ / have some fun with your friends. This is bad news, as it is quite rolly at times in Ayala Cove (ferries/tugs). We’ve found this is hard on fenders, deck hardware, and lifelines, and can be extremely bad news if you get your rigs tangled.
- If you insist on rafting, put every fender you and your buddy own between the boats, tied to the toe-rail instead of the lifelines, and make sure your masts are displaced fore and aft so the rigs don’t tangle.
- If someone comes out on a paddleboard or dingy and offers to help, take their help. I was trying to be a hero one late night, refused such an offer, and promptly fouled the stern line in my prop. And thus ended up needing to swim twice (in wetsuit): once to get the bow ball attached to my now-propless boat, and once again in the morning to clear the prop.


Less Serious Pieces of Advice:

- Ayala Cove Live Cam (mooring field in upper left)
- It is best to arrive before noon. This way you will have the fewest boats watching/judging you, and the most opportunity to watch/judge other boats.
- I have empirically discovered, particularly for the second mooring ball, that yelling “clip the heck out of it!” louder and louder from the helm position really helps the crew focus on their singular task and can measurably improve performance.
Web Resources:
- Angel Island Conservancy website